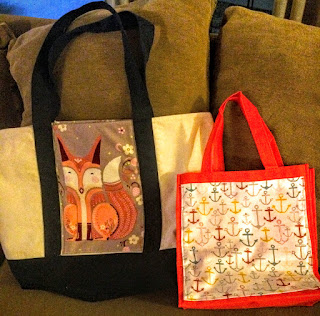
I'm not sure how it is where you live, but in Los Angeles you have to pay for market bags, or any bags for that matter. Let's not even talk about all of the damage the plastic bags are doing to our beautiful Earth.
So take out you're sewing machines!
We are going to make the cutest $1 Tote bags ever and stop using those plastic bags for good!

You know those dollar bags everyone seems to be selling these days? I have a bundle of them.
Truth is, I only want to hit the market once a week! Which means I need about five of these bags to be in the car, ready for deployment for my early morning market day!
The only thing is, as you can see, they aren't very cute.
So, what I've done is made those unattractive but utilitarian bags fun to use! Who wants to carry around a boring, logo'ed bag when you can alter them slightly and make them super cute!? I'm telling you, I've got the cutest bags in town! And it takes no time at all!
Start by picking a bag and take out the hard plastic bottom if it has one. Measure the space you'd like to cover. I like to do a strip down the middle to cover a logo or just add some pizazz. Or, you can just do the exact size of a logo you're looking to cover up. Often, I can just use a large scrap. While at a quilt show, I like looking for fun and different fabric that would be unusual and unexpected on a bag. I've found some really great imports from Japan at Quiltcon; bears dancing with umbrellas, deers with red glasses, ohh it's just endless! Plus I like to make some of the bags a little masculine so my husband can use them as well.
For this example, I'm going to use a panel of Bee Creative fabric by Moda (and again, you can use whatever you have on hand it doesn't need to be a panel as you'll see in some of the finished bags below).
Measure and cut your fabric 1/4" larger than needed on all sides.
Fold back the raw edge 1/4" and press the seam on all the sides.
Lay the panel over the space you're looking to cover. Sometime you need a little finessing to make it fit in perfect.

Pin real well, and sew slow. It's super easy to catch other parts of the bag in the seam by accident. Guess how I know that!...

I like to sew the fabric down super close to the edge, but again that's up to you. You can also do a fun fancy stitch.
You too can do this, even over breakfast!
Besides grocery getters, you can make these into your own personalized gift bags. Let's be honest - those gift bags sold in stores are a small fortune. Giving a gift in one of these cuties raises the gift giving bar. Who doesn't love receiving handmade gifts? Even better is these bags can be used and reused for years to come. Think how many plastic bags you'll be saving? And Mother Earth cheers!
Here's another option, both are equally fun.
On this grey bag there's a logo on both sides.
So I'm just going to open up the seam...
place this adorable Robert Kaufman clothes line pin fabric across the middle...
and same thing as before measure out the the size strip you'd be happy with. Fold the raw edge under, once is all it needs. Give it a quick stitch on both sides, again I prefer getting super close to the edge. I think it gives it a more profession look.
Once you sew both sides; front and back, tops and bottoms, sew the sides back up.
Flip it right sides out and you my friend are done!
How cute are these!?
And sew can you! :)


i like your work for fabric bag....
ReplyDeleteto get more design in weaveron textile click on this link....:http://www.weaveron.com/
So luck to come across your excellent blog. Your blog brings me a great deal of fun.. Good luck with the site.
ReplyDeletebag+canvas